Warehouse configuration in Briskport
How to configure your warehouse connection details in the Briskport platform.
After preparing your warehouse and establishing a connection with Crisp, the next phase involves integrating the warehouse with Briskport. This ensures a seamless flow of data from your Crisp chats directly to your data warehouse.
Prerequisites
Before configuring the warehouse in Briskport, ensure you have:
- Completed Step 2: Configuring Your Warehouse
- Your database connection details at hand (host, port, database name, username, and password)
- An active Briskport account
Step 1: Access warehouse settings
- Navigate to Briskport's platform.
- Log in using your credentials.
- Once on the dashboard, locate and click on the Warehouse tab.
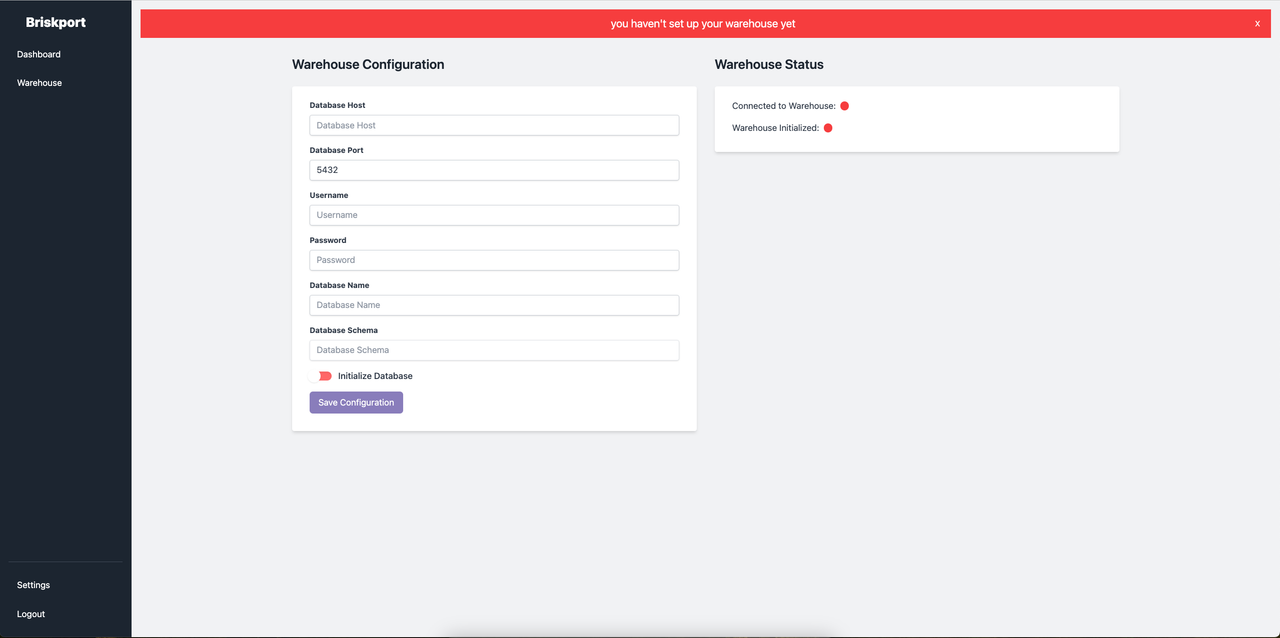
Step 2: Enter database connection details
In the Database Settings section, input the following:
- Host: Your database's host URL
- Port: The port number for connection
- Database Name: Your database name
- Username: The
briskport_usercredentials you created earlier - Password: The associated password
- Database Schema: The schema you set up (e.g.,
briskport)
Step 3: Save configuration
After entering all the details, test the connection to ensure everything is set up correctly. Once verified, click Save to finalize the warehouse configuration.
Step 4: Verify data flow
To ensure the integration is working:
- Initiate a test chat on your Crisp platform.
- Check your warehouse to verify that the chat data has been received successfully.
Tip: Set up regular monitoring to keep an eye on the data flow. This will help you quickly identify and address any issues.
Congratulations! Your warehouse is now fully integrated with Briskport, ensuring a seamless transition of chat data for better analytics and insights. If you encounter any issues, please contact our support team for assistance.